Restoration lets you process large, disaster-driven jobs — fire, flood, smoke — for a single customer without losing track of rooms, contractors, insurance billing, or promised dates. You detail restoration orders much the same way you handle counter, route, and hotel work; the difference is in date-sensitive adjustments, reporting, and billing, and SPOT includes a set of features built specifically for it.
This article walks the full restoration workflow in order: configure the company and store settings, set up the restoration customer, detail their orders, flag non-salvageable items, close or pay the job, and run the manifests.
Prerequisites
Company Configuration: Rooms, Contractors, and Insurance Companies defined under Company Restoration Settings.
Store Configuration (Optional): A local Export File Folder set in Store Restoration Settings if using CRDN.
User Rights: The Flag Restoration Items Non-Salvageable and Close Restoration Orders Activity Rights granted to the staff who will work restoration jobs.
Price Table: A department named Non-Salvageable (or Non-Restorable) in the price table used by the restoration orders, if you plan to flag non-salvageable items.
Configure Company Settings
Company-level restoration settings define the three lists used throughout the workflow. All three live under the same branch of Program Configuration.
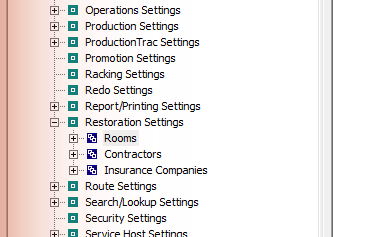
Rooms
Path: Setup > Program Configuration > Company > Restoration Settings > Rooms
Defines the Room Types you select when detailing a restoration order — for example Bedroom, Master Bedroom, Bathroom, Kitchen, Closet, Basement, Living Room. Room Types are stored by name.
Tip
Create a Room Type called Other for jobs that aren't organized by room. You can then add specifics in the description field instead of cluttering the list with job-specific Room Types.
Contractors
Path: Setup > Program Configuration > Company > Restoration Settings > Contractors
Defines the outside companies that may perform tasks on a restoration job — leather cleaners, alterations companies, and so on. Each contractor is stored by name with an optional description, and becomes selectable on the customer's Contractor tab.
Insurance Companies
Path: Setup > Program Configuration > Company > Restoration Settings > Insurance Companies
Defines the insurance companies that can be associated with restoration jobs. Each is stored by name with an optional description, and becomes selectable on the customer's Insurance tab.
Editing these lists
Rooms, Contractors, and Insurance Companies can be deleted or renamed without issue, but doing so is not recommended once they are in use. Use Hide Item to retire an entry without removing it, and Set as Default / Move Up / Move Down to control what detailers see first.
Configure Store Settings
Store-level settings control how manifests group and print for this location. Only one of them is required.
Export File Folder (Required)
Path: Setup > Program Configuration > Store > Restoration Settings > Export File Folder
Set to: A local folder on the station's C:\ drive — for example C:\exports. Create the folder first, then add the path as follows: \\client\c$\exports
This setting gives SPOT a working location for building restoration manifests. Without it, restoration reports cannot be created.
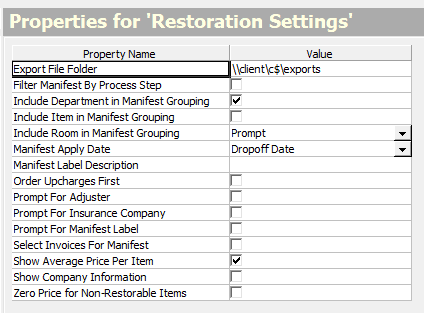
Every other setting on this screen is preference — manifest grouping by department, item, or room, the manifest apply date, prompts for adjuster, insurance company, and manifest label, average price per item, and zero-price handling for non-restorable items. Review each setting and its description to decide what fits your operation.
Set Up a Restoration Customer
Open the customer's Details tab
Open the Customer View screen for the customer and select the Details tab.
Toggle the customer to Restoration
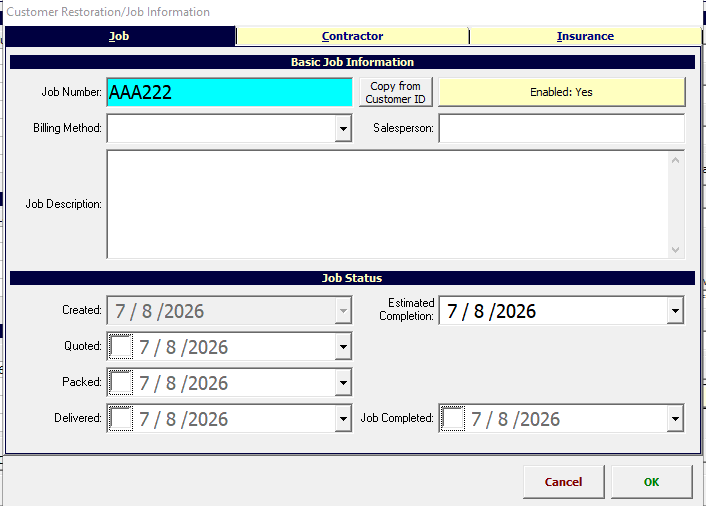
Use the toggle button in the bottom right of the Other Details panel. By default it reads Restoration Customer: No. Selecting it opens the Customer Restoration/Job Information dialog.
Fill in the Job tab
Job Number: Required. Enter any value, or use the Copy from Customer ID button to the right of the field. If the customer had a restoration job before, their previous job number is shown. The Enabled indicator beside it shows whether the customer is currently active as a Restoration Customer.
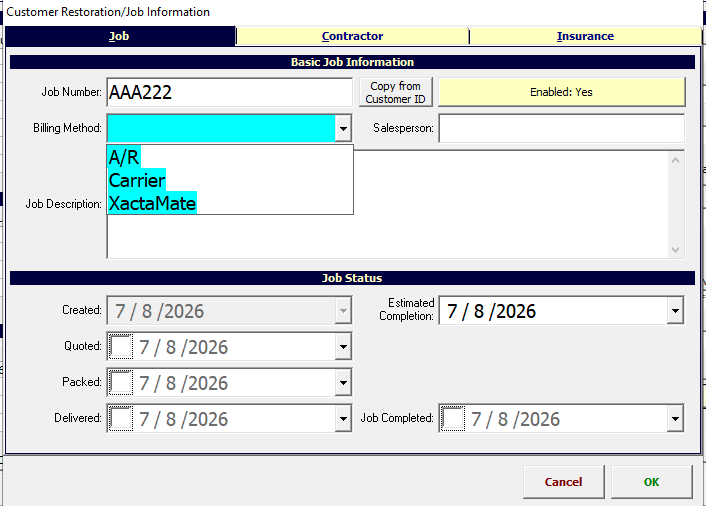
Billing Method: Three options — A/R (billed through an A/R account), Carrier (billed through an insurance company), and XactaMate (a large insurance broker that provides pricing for specific areas/regions; spelling as it appears in SPOT).
Salesperson: Optionally record the salesperson or project lead for the job.
Job Description: Optionally record miscellaneous details about the job.
Track Job Status dates
The Created date is set automatically when the customer becomes a Restoration Customer and cannot be changed. The Estimated Completion, Quoted, Packed, Delivered, and Job Completed dates can be set and checked off as each milestone is reached.
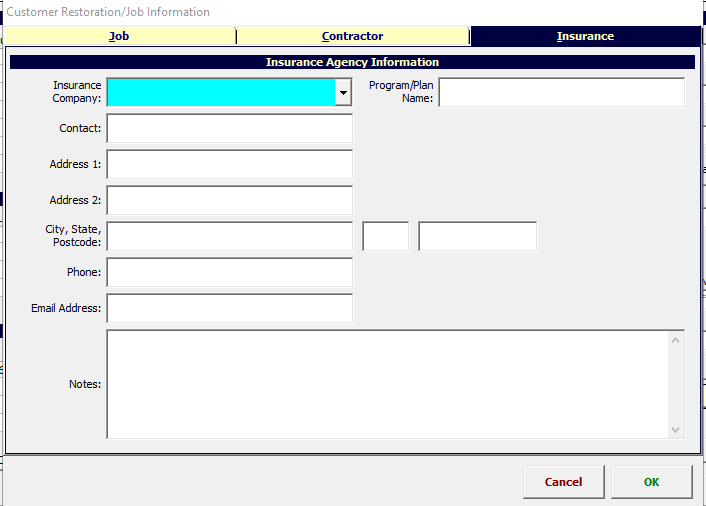
Fill in the Contractor and Insurance tabs
The Contractor tab stores contact information for the contractor assigned to the job; its dropdown lists the Contractors created in Program Configuration. The Insurance tab works the same way for the associated Insurance Company.
Note
As of the time of this article, the Job Number is the only field in this dialog that other SPOT functions depend on. All other fields are optional, informational entries.
Detail Restoration Orders
Once a customer is set up as a Restoration Customer, detailing picks up the restoration workflow automatically.
Detail the order as usual
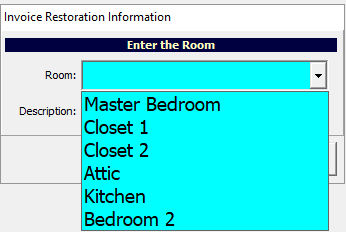
When you detail an order (not when you quick an order), SPOT immediately prompts you to select a Room Type from the list configured in Program Configuration, plus an optional description.
Check the visual invoice
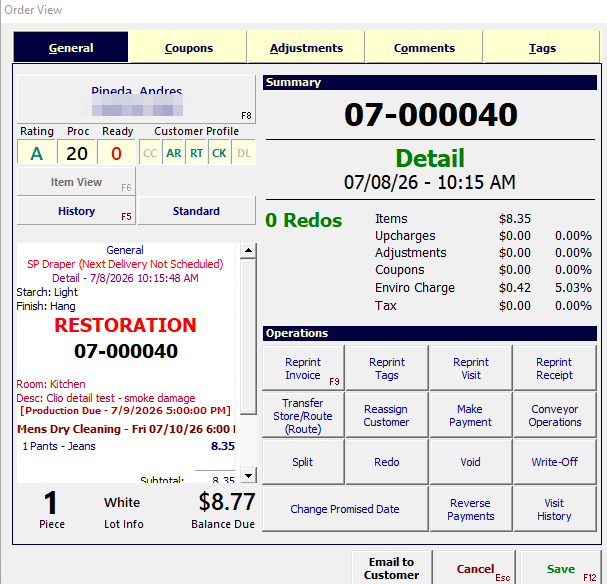
The visual invoice displays a RESTORATION flag along with the Room and Description you entered, identifying the invoice as belonging to a Restoration Customer.
Verify the room before completing detail
There is no way to reassign or change the Room Type or Room Description once an invoice has been detailed. Redetailing the order prompts for a room again, but that entry applies to the newly marked-in pieces — it does not update the existing invoice.
The Room Type and Room Description can be added to invoice templates in the Document Designer using the data nodes Restoration > Room and Restoration > Description.
Flag Non-Salvageable Items
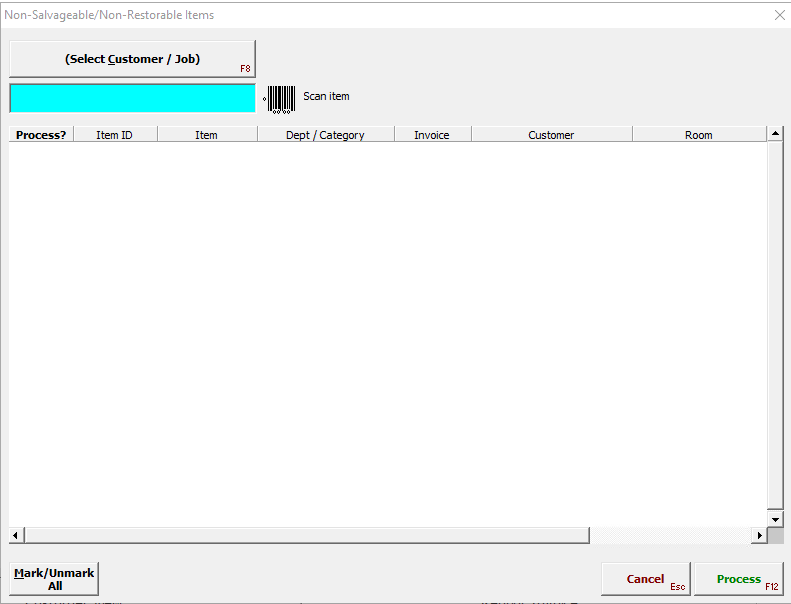
The Non-Salvageable Items screen lets you flag specific items in a restoration job as non-salvageable. Flagged items can then be excluded from — or included in — the restoration manifest.
Setup
The price table used by the restoration orders must contain a department named Non-Salvageable (or Non-Restorable), pointing to a department group of the same name.
When non-salvageable items are split into new orders, they map into the Non-Salvageable department if a full matching Category > Item mapping exists; otherwise they are created in the department as describe-and-price items.
Staff need the Activity Right Invoice > Flag Restoration Items Non-Salvageable, granted under Setup > Users, Groups, Rights > Activity Rights.
If the department is missing
SPOT displays "Price Table Setup Needed — The price table '<name>' does not have a 'Non-Salvageable' department defined." Items from invoices using that price table cannot be split off as non-salvageable and will not appear in the item list.
Usage
Go to Menu (F3) > Order Management > Restoration Non-Salvageable Items, select the Account/Customer/Job, scan or mark the invoices, and click Process.
Non-Salvageable items will be split from their source invoices and placed on a new, non-salvageable invoice to separate them from restorable items.
Close, Prepay, or Post Orders
Restoration – Close Orders
Path: Menu (F3) > Order Management > Restoration - Close Orders
What it does: Closes the job's orders so that production commitment (promised dates) no longer applies to orders that are no longer active. Use this if you’re not tracking payment in SPOT. Requires the Activity Right Invoice > Close Restoration Orders.
Prepay or Post Restoration Job
Path: Menu (F3) > Payments > Prepay or Post Restoration Job
What it does: Takes payment against the restoration job as a whole.
Use this instead of Order Pickup
Order Pickup can fail to load when the selected customer has a large amount of unsold order data — which restoration customers usually do. Always use Prepay or Post Restoration Job for restoration payments.
Run Reports and Manifests
All restoration reports are located under Reports > Reports Gallery > Restoration. Most are manifest reports: run the report and select a customer.
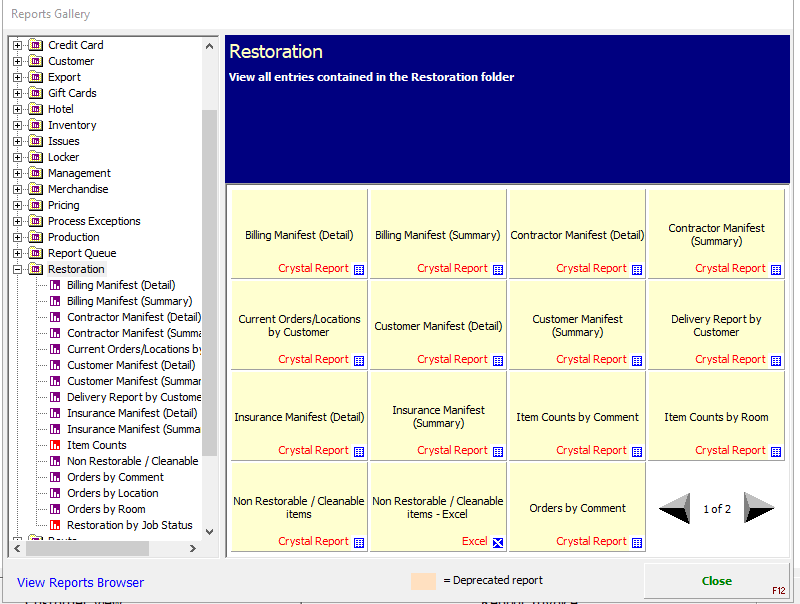
The Restoration folder includes:
Billing / Contractor / Customer / Insurance Manifests — each in Detail and Summary versions.
Current Orders/Locations by Customer and Delivery Report by Customer.
Item Counts by Comment and Item Counts by Room.
Non Restorable / Cleanable Items — standard and Excel export versions.
Orders by Comment / Location / Room and Restoration by Job Status.
Reminder
If you’re a CRDN customer, your RestoreNet import files will not work unless the local restoration folder is configured in Store Settings — see Configure Store Settings.
Questions? Contact SPOT support at 801-208-2210 or Support@spotpos.com.