SPOT boasts a wide range of reports that allow you to get the exact data that you need. However with such an extensive list, this can become a massive burden to navigate, especially with reports that you want to run every day. The quick reports tabs solve this problem. The tabs are used to present a few key reports in a much smaller and easier format to access.
Required
User Rights
In order to edit the quick report tabs, the user will need the rights to enter the company settings.
Setup > User Groups Rights.. > System Rights > Select the user group on the left
Allow Activity Setup
Allow Activity Setup (All)
Allow Activity setup (Company)
Access to the reports tab can be disabled. To view reports, make sure that this right IS NOT checked.
Setup > User Groups Rights.. > Activity Rights > Select the user group on the left
Production > Disable Reports
Overview
Quick Report Tab
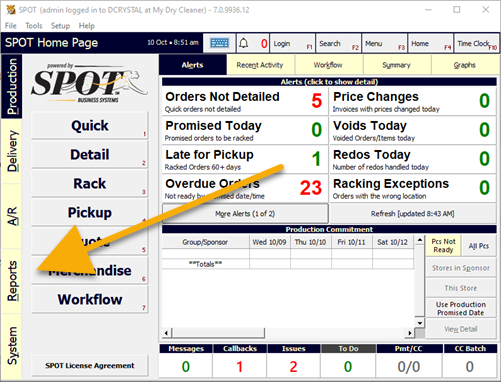
The quick report tab is located under the Reports tab on the left side of the SPOT home page.
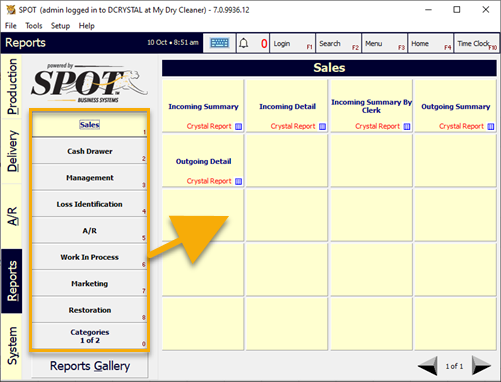
The column on the left lists all of your quick report tabs. Each one of these tabs will display a customizable list of reports; these tab names can be created, deleted, or edited to suit your needs.
Setup
Manage Report Tabs
To manage the quick report tabs, you will need to navigate to:
Setup > Program Configuration > Company > Report/Printing Settings > Quick Report Tabs
Create a Table
Right click on Quick Report Tabs then select Create new 'Quick Report Tabs'.
.png)
Change the name to match your intended category of reports.
Next, select the Edit button.

Choose your reports from the list of Crystal Reports, Excel, or Word Merge.
You can use the Add >> and << Remove to edit what reports show on the tab. The Move Up and Move Down buttons to allow you to edit the tab's list order as shown overview section. Tip: This can be important if you select enough reports to fill more than an entire page.
.png)
Edit Tab
Select from the list of already created tabs.
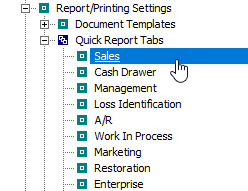
Change the name to match your intended category of reports.
Next, select the Edit button

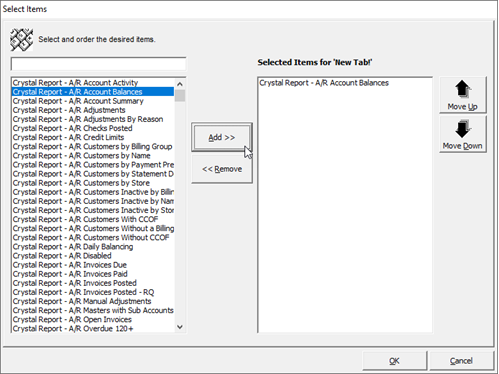
Choose your reports from the list of Crystal Reports, Excel, or Word Merge.
You can use the Add >> and << Remove to edit what reports show on the tab. The Move Up and Move Down buttons to allow you to edit the tab's list order as shown overview section. Tip: This can be important if you select enough reports to fill more than an entire page.
Delete Tab
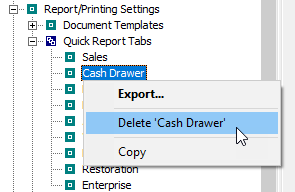
Right click the tab that you wish to delete, then select Delete '(Name of Tab)'.
It is that simple!
Usage
User Access for Tabs
Even if the user has access to the reports tab, you may want to limit access based on individual users and/or user groups.

To do this, navigate to:
Setup > Program Configuration > Company Settings > Report/Printing Settings > Quick Report Tabs > (Select your tab) >
Restrict Access to Users and Groups
Make sure this is checked if you want to enforce user and/or group access restrictions.
Allowed Groups > Edit
Select your allowed groups from the list that is populated.
Allowed Users > Edit
Select your allowed users.
Tip: These settings are meant to work in conjunction with disabling the user right to enter the 'Reports Gallery'.
Setup > Users, Groups, Rights... > Activity Rights > (Select User Group) > Production > Access Reports Gallery : Unchecked