The ability to print tags in Connect is now available. This article will detail the required configuration settings to activate this feature. It presumes that the reader is already familiar with configuring tag printing in SPOT, therefore it omits the intricate steps involved in establishing a tag printer in Windows from scratch.
Prerequisites
Request tagging in Connect is enabled for your company. You can contact our Product Support team with your request via e-mail or phone.
A supported tag printer (Epson U-200, Epson U-220, STAR SP-700)
SPOT Configuration
Store Settings
If you’re already printing tags from SPOT today, you can skip this step as the necessary department settings should already be configured.
Navigate to
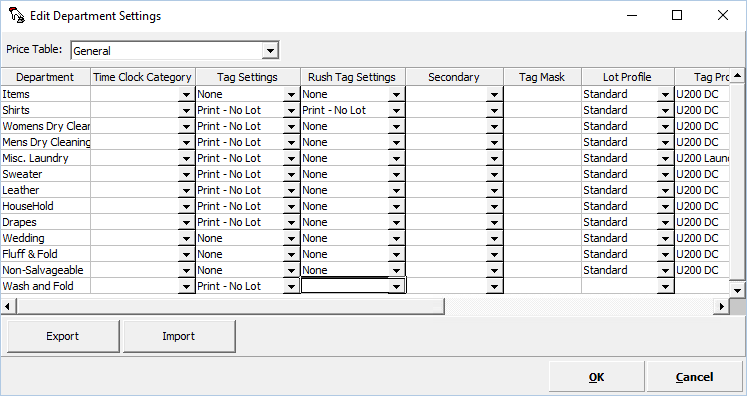
SPOT > Setup > Program Configuration > Store > Mark-In Settings > Department Settings

The supported values for the Tag Settings and Rush Tag Settings columns are “Print” and “Print - No Lot”.
The “Tag Profile” and “Rush Tag Profile” rows require a U200 tag profile configuration. The U200 tag profile does not require creation or modification and comes bundled with your installation of SPOT.
Don’t forget to ensure all price tables you intend to use with tag printing have these settings configured by using the drop-down menu at the top of the department settings view.
Workstation Settings
Navigate to
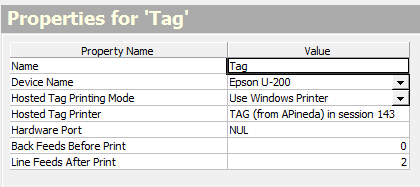
SPOT > Setup > Program Configuration > Workstation > Tag Printers

Name: “Tag” is an acceptable name if you have only one tag printer at this workstation.
Device Name: Set to “Epson U200” or “Star SP700(EPOS)” depending on model of printer in use.
Hosted Tag Printing Mode: Set to “Use Windows Printer”
Hosted Tag Printer: The windows name of the printer. Right click on the empty row to display a list of detected Windows printers to select from.
Hardware Port: This is ignored when using “Windows Printer” configuration.
Back Feeds Before Print, Line Feeds After Print: Advanced settings, we recommend you do not modify these values.
Navigate to
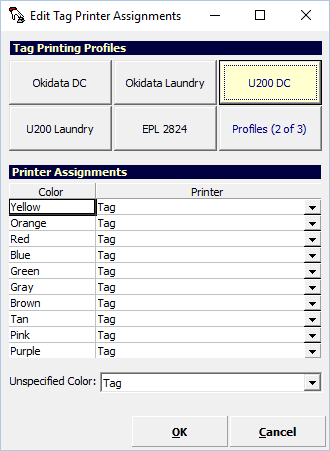
SPOT > Setup > Program Configuration > Workstation > Tagging Settings

Search for the tag printing profile(s) you selected in the Department Settings of your store configuration (ie. U200 DC, U200 Laundry). Clicking on the “Profiles (x of y)” button will move you through the list of available profiles.
Click on each profile used in store settings and ensure that “Printer Assignments” has the tag printer name from Workstation > Tag Printers selected for every available option.
Detailing from Connect
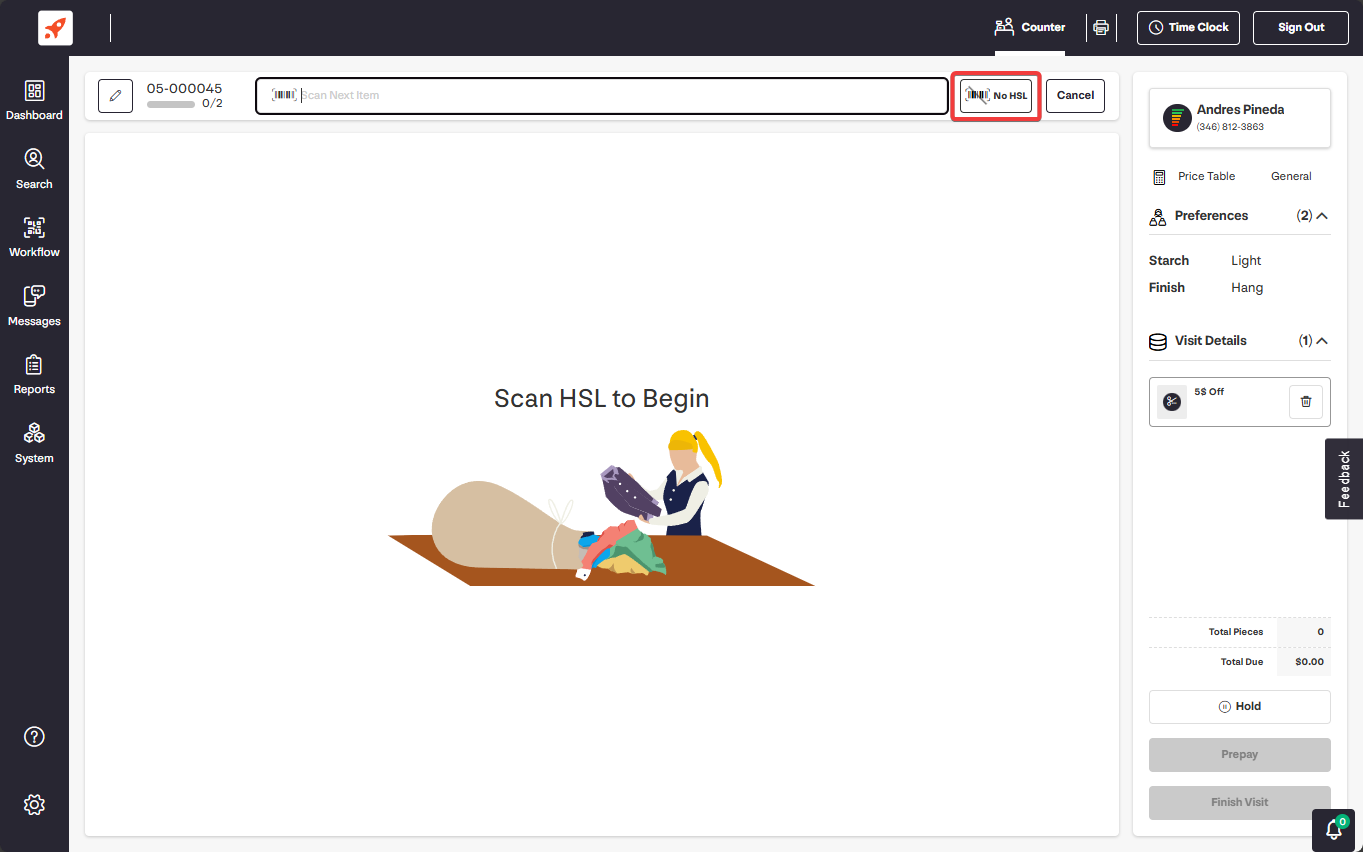
When detailing from Connect, tag printing will only occur when you select the “No HSL” button at detail, and then select a department previously configured as shown in the Store Settings.
Note that if you have yet to request the ability to skip HSL assignment at Detail with your Connect instance, you can reach out to our Support team to request this feature.
