SPOT Offline Services (SOS) provide SPOT hosted customers with offline access to critical data in the event of a hosted service interruption or local internet outage. Data is sent up to three times per day on a user-defined schedule to your secure Microsoft OneDrive cloud storage account. This data is then sent automatically to your local workstation and is immediately available for use.
Requirements
Microsoft Windows 10, 7, 8.x, 2008, or 2012
1024 x 768 monitor (minimum)
Current version of Chrome or Firefox web browser (Microsoft Internet Explorer is not compatible)
1-3 GB of local hard disk storage
Microsoft OneDrive account. Currently SOS supports the personal version of OneDrive. The "OneDrive for Business" accounts are not supported at this time. You can sign up for your personal OneDrive account with limited storage here.
Validate correct time zone is configured in SPOT
SPOT hosting services account
SOS set up and tested prior to an outage
Overview
SOS Features
There are two tools offered through SOS to help you run your business in the event of an outage:
Order Pickup This tool allows your to locate and pick-up in-process and ready orders. Clerks can print lightweight counter and customer receipts to the workstation's default printer. A post-back feature is also available, offering you the ability to submit pickup information back to SPOT once service is restored.
Assembly This tool allows you to assemble in-process orders and to identify heat seal items not currently detailed. All items associated to an order are grouped to a slot assigned to that order. Non-detailed HSL items are grouped by the customers they belong to. Lightweight invoices and customer slips are printed to your default printer, your assembly processing quick and easy to manage.
SOS Limitations
When considering your company’s service contingency plan, please be advised that SOS is not intended to be a replacement for SPOT itself. For example, SOS cannot:
Add or edit customers, orders, or items
Process credit card transactions
Share data across multiple workstations
Send emails or notifications to customers
Run reports
Configuration
OneDrive Configuration
Login to your OneDrive account and select the “Get Apps” option from the main screen.
Select your windows PC based device and download the setup utility.
Run the setup wizard and follow the instructions defining the local directory you would like to use for cloud synchronization.
During the setup wizard you are prompted to select folders/directories to synchronize. Create and select the “SOS”, “Assembly” and “OrderPickup” sub folders as a minimum.
Complete any remaining prompts found in the wizard.
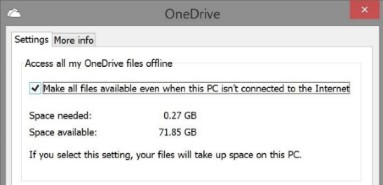
If running Windows 8.x or higher, enable offline access to all files. You can do this by right-clicking on the One Drive icon in your system tray and selecting settings. Then check the box that says “Make all files available even when this PC isn’t connected to the internet.†If this is not configured, SOS will not run properly
SPOT Service Configuration
In SPOT, navigate to Setup > Program Configuration > Company Settings > Service Host Settings > > SPOT Offline Services Settings
Configure what data you would like to receive and the times you would like to receive them. If you are not using ItemTrac/HSL in your operation, the “Enable Assembly” data will not be sent.
In the example below you will receive the “Order Pickup” data push at 9:00 AM, 1:00 PM and 4:00 PM.
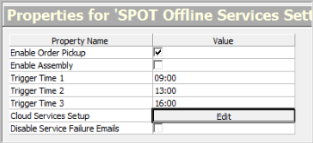
Configure cloud services provider by selecting the “Edit” button next to “Cloud Services Setup”
Select “Microsoft OneDrive” from the Offline Cloud Service option list.
Select “Authenticate Service.” When authenticating the cloud service, you will be prompted for login credentials for the OneDrive services. If you are having issues authenticating with your credentials please verify you can login to the account via your local web browser to validate credentials.
Select “OK”.
“Save” your settings
Configure "Offline Requests" Alert
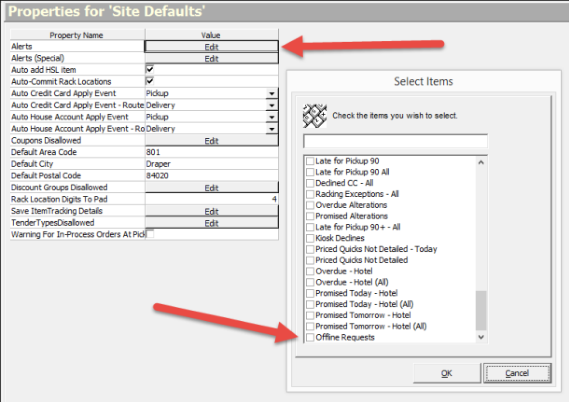
Navigate to Setup > Store Settings > Site Defaults > Alerts > Enable "Offline Requests"
Store Time Zone Configuration
Navigate to Setup > Location Information > Store > Time Zone
Select the correct time zone for your store.
“Save” your settings.
Using SOS
SOS Start
Browse to the OneDrive\documents\SBS\SOS\OrderPickup folder/directory
Notice files in this directory that start with a date and end with your store name and number (example: File 2014_09_09_20_30_ABC Cleaner01.htm – File includes data for ABC Cleaner store #1, Downloaded on 9/9/2014 at 8:30 PM

Selecting the most current file for your store number ensures you will have the most current inventory for your store.
Please verify that you have selected the correct store and file by verifying the store name and date as noted below.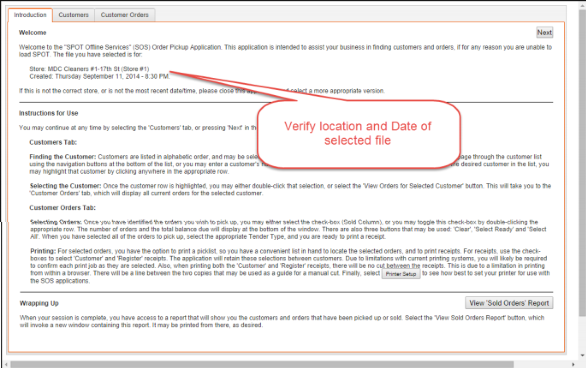
Press F11 to enable your browser to go full screen allowing more viewable area for the application. (Press F11 again to return to standard viewing mode)
Review the documentation on the home page for information on usage and configuration.
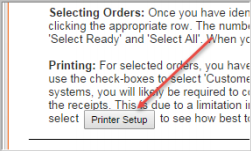
Please review the “printer Setup” template to assist in configuring your browsers printer setup. You will find the “Printer Setup” button on the “Introduction” tab.
Select the “Customers” tab found at the top of the screen and review the following fields and options:
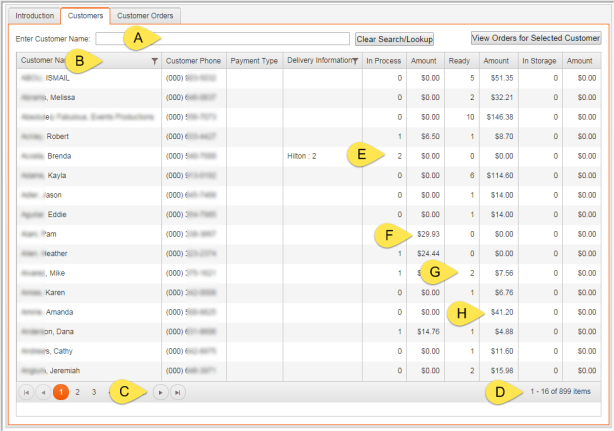
A: Search option. Like SPOT you will search by last name, first name
B: Customer list sorted by last name (Notice the filter option available on this field)
C: Scroll page to page of customer records
D: Number of active customers
E: Number of orders in process
F: Balance of orders in process
G: Number of Ready orders
H: Balance of Ready orders
Order Pickup
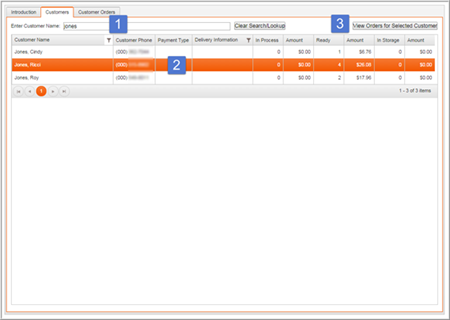
Search for a customer using first and last name.
Select the customer and double click or select the “View Orders for Selected Customer” button.
Select individual orders to be picked up or use the “Select All” button.
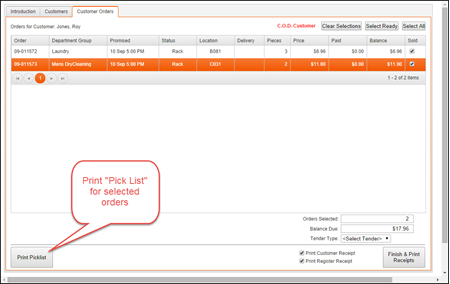
Select the “Print Picklist” button and generate a pick list of the selected orders including location information.
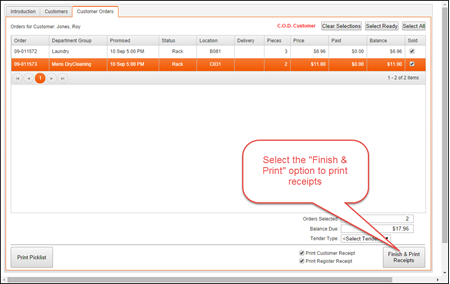 \
\Select “Tender Type” for transaction.
Select “Finish & Print Receipts”
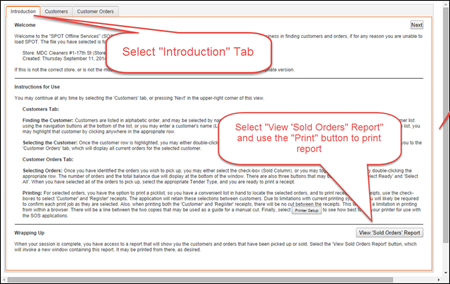
End of Day processing - Print Reports. Navigate to the introduction page and select “View Sold Orders” and print the report for your records.
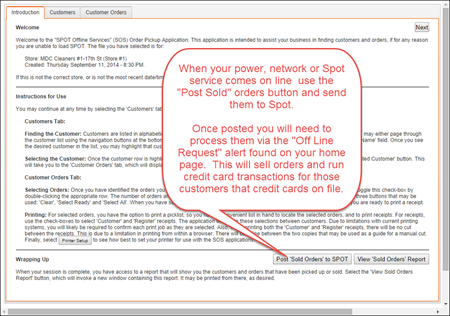
End of Day processing - Post orders. Navigate to the introduction page and select “Post Sold Orders” and post any sold orders to SPOT. These posted orders will need to be processed using the “Offline Requests” alert found on your homescreen.
Assembly
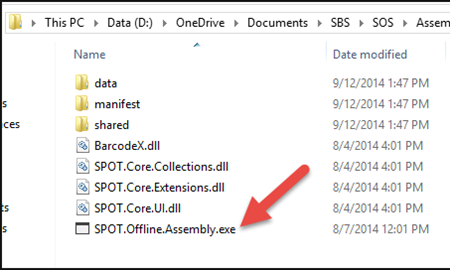
Browse to the local computer's OneDrive\documents\SBS\SOS\Assembly folder/directory and select the “Spot.Offline.Assembly.exe” application.
.png)
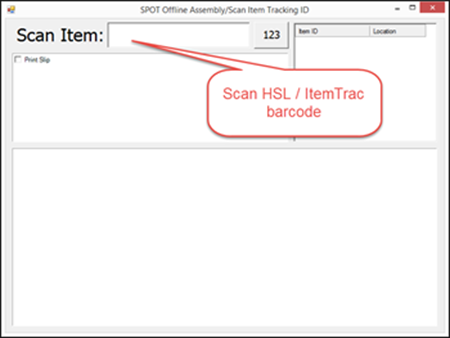
Scan HSL/ItemTrac barcode (option shows item associated with a detailed order)
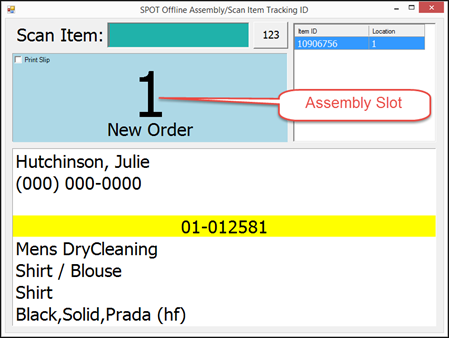
Locate garment on customer slot indicated on screen. All pieces for a customer will be assembled to a unique slot number.
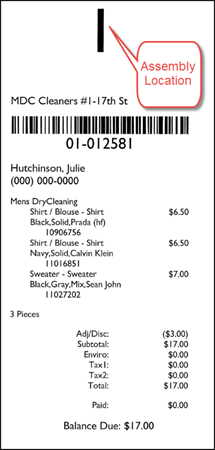
Place the item and option printed details slip on the slot indicated
Continue scanning pieces. You may see X of X pieces, Single Item, or Order Completed indicated for an order.