SPOT's Scheduled Tasks function allows you to automate customer-messaging and other functions, saving you time while offering reliable service and communication to your customers.
Requirements
Requirements
SMS and Email Information
SPOT customers can use Scheduled Tasks to execute a number of SMS- and email-based communications. To take advantage of these features, SMS and email will need to be fully configured for the users and customers who need to receive these communications.

Service Framework Key
Verify that your Service Framework Key is entered into SPOT.
Navigate to Setup > Program Configuration > Company > Account Settings > Service Host Settings > Account Name and verify the key is entered. If the field does not have a value, please contact SPOT Suppot at 801-208-2210.
Custom Reports Path
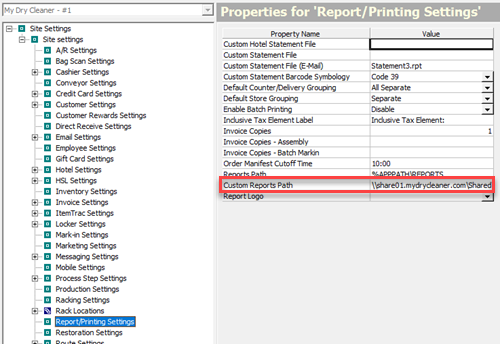
Verify that the file path for your Custom Reports is set.
Navigate to Setup > Program Configuration > Store > Site Settings > Report/Printing Settings > Custom Reports Path.
This should have been set during your store's initial setup. If the field does not have a value, please contact SPOT Suppot at 801-208-2210.
Enable Report Queue
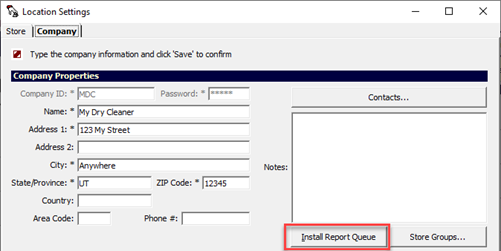
Verify that the Report Queue is installed/enabled. Navigate to Setup > Location Information > Company Tab > Cick Install Report Queue.
Note: If the Install Report Queue button is grayed out and displays Report Queue Enabled, no action is necessary.
Using Scheduled Tasks
Create a New Scheduled Task
Navigate to Setup > Scheduled Tasks...

Click the Add button.
Task Details
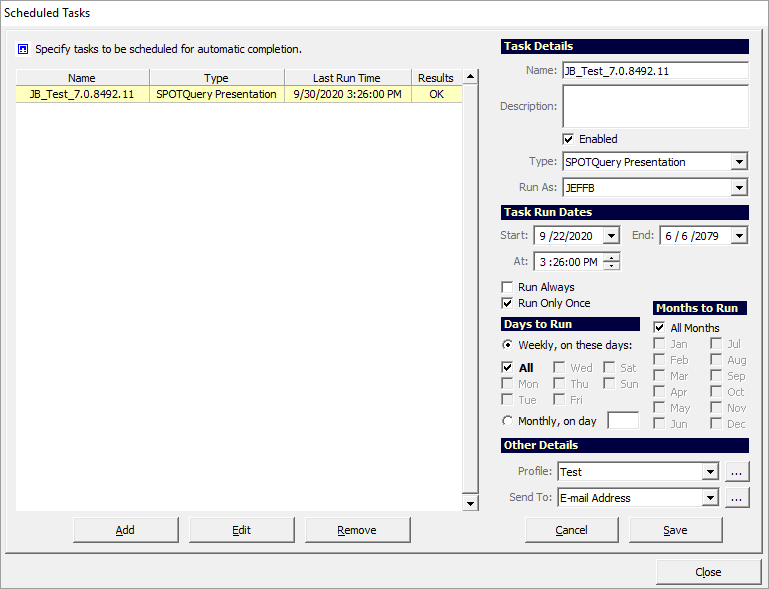
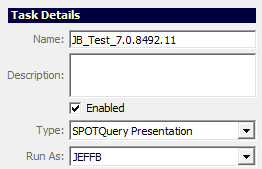
Name: The name used to reference the Scheduled Task.
Description (Optional) A description of the Scheduled Task. This may be useful to quickly reference the Task's intended usage or settings.
Enabled A checkbox used to enable or disable the Scheduled Task. Task is enabled by default.
Type: Select from the type dropdown. The Scheduled Tasks types are described in the next section of this page.
Run As: Set the user profile the Scheduled Task will "run as."
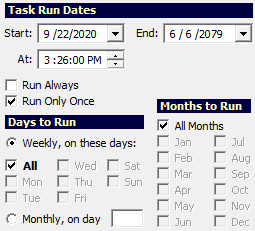
Task Run Dates
Start: The first day the Scheduled Task will execute.
End: The last day the Scheduled Task will execute.
At: The time of day the Scheduled Task will begin to execute.
Until: The time of day the Scheduled Task will cease to execute. Field may not be available, depending on Type:, set above.
Run Always Toggles whether the Scheduled Task will .
Run Only Once Toggles whether the Scheduled Task will run only once.
Interval (minutes): Sets how frequently the Scheduled Task will run. Field may not be available, depending on Type:, set above.
Days to Run Select either Weekly and specify All or individual day(s) or Monthly and the numerical day of the month on which the Scheduled Task will run.
Months to Run Select either All Months or specific month(s) on which the Scheduled Task will run.
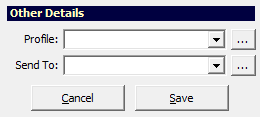
Other Details
Profile: (Only available for Scheduled Task Type SPOTQuery Presentation, set above) Select from a list of configured SPOTQuery profiles.
Send To: (Only available for Scheduled Task Type SPOTQuery Presentation, set above) Sets the recipients for the configured SPOTQuery profiles. Set this to E-mail Adress and click the  button to the right to populate a table of email addresses which will receive the generated SPOTQuery report.
 Depending on the value set for Scheduled Task Type, above, you will see or one two of these buttons. Use them to select store lists, email/SMS templates, dates and times for SPOTQuery Reporting, etc.
Important Note: When editing a Scheduled Task, these buttons do not update if you change the value for Type:, set above. If you change a Scheduled Task's Type: value, click Save and begin editing again to update the menus provided by these buttons.
Scheduled Tasks Types
The following are the various Scheduled Tasks Types, set by the Type: drop down field, and their descriptions.
Scheduled Task Type | Description |
|---|---|
Order Ready Email/SMS | Sends an email/SMS to all customers whose orders came ready during configured Run Dates. |
Order Delivered Email/SMS | Sends an email/SMS to all customers whose orders were delivered during configured Run Dates. |
Order Sold SMS | Sends an SMS to all customers whose orders were successfully sold (paid for) during configured Run Dates. |
Route Stop Email/SMS | Sends an email/SMS to all Route customers whose stop a driver visited during the configured Run Dates. |
Push Notifications | Sends a Push Notification (selected with the "three dot button" to the right of dropdown) to customers' with your mobile app. See separate section below for more information. |
Locker Bag Collected SMS | Sends an SMS to all customers whose bags have been picked up from a Locker during the configured Run Dates. |
Locker Order Delivered Email/SMS | Sends an email/SMS to all customers whose Locker order has been delivered during the configured Run Dates. |
Locker Order Moved Email/SMS | Sends an email/SMS to all customers whose Locker order has been moved from to a different locker. |
Locker Order Present Email/SMS | Sends an email/SMS to all customers whose Locker order has yet to be picked up. |
Locker Order Returned Email/SMS | Sends an email/SMS to all customers whose Locker order has been returned to the Store because it had not been picked up before the "Return to Store Interval," as set in Delivery Connect. |
Email Inbox Sweep | Queries a POP3 email server and imports new emails. New emails are included in the Notification Center. If the sender's email address exists on a customer account, the message will be included on that customer's Messages tab. Consult your email service provider for required credentials. |