Barcoding items via HSL or ItemTrac is a powerful tool that will speed up your mark-in process along with almost every other process in your drycleaner.
Overview
Assign/Use HSL
From the SPOT home screen, select 'Detail' or press '2' on your keyboard to begin the detailing process. Then select your customer.
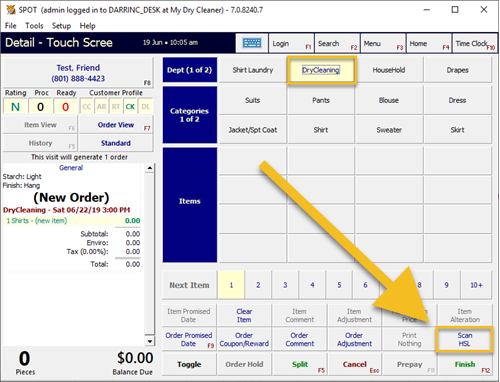
Unless you have changed the HSL settings at the store level you will have to manually select the 'Scan HSL' button after choosing your department.
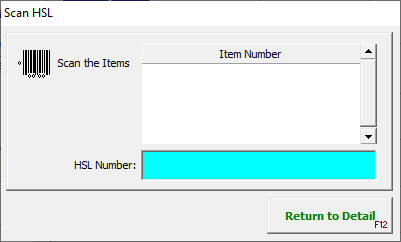
Scan the first HSL item. If this HSL has already been detailed, the item will appear on the digital invoice and you can repeat the process.
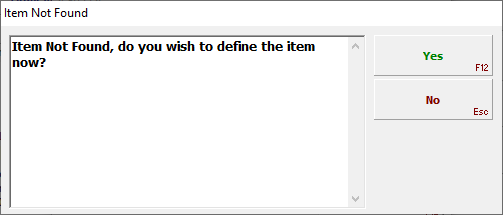
If this is a new HSL that has not been attached, it should bring up the 'Item Not Found' dialog. Select 'Yes' to detail.
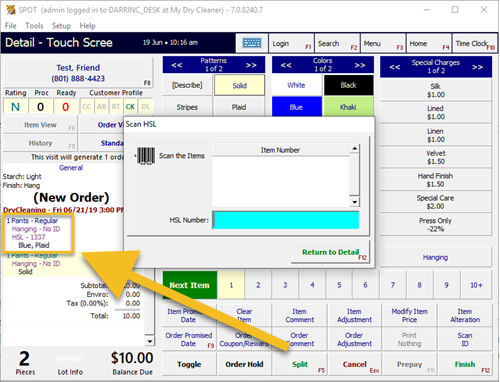
After clicking yes, you will be returned to the detail screen. After detailing the item you will notice that the HSL number will appear in the digital invoice. The Scan HSL dialog automatically reappears.
Continue scanning your items. If the Item Not Found dialog does not come up, you should see the item automatically appear in your digital invoice. Once the item has been defined, it remains in the Spot database permanently.
Setup
HSL
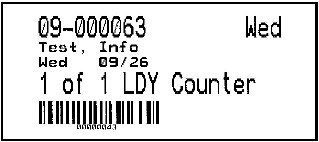
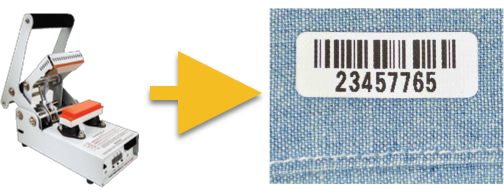
HSLs (Heat Seal Labels) are pre-printed labels that have a barcode and a value. These labels are heat pressed onto inconspicuous areas of garments for permanent use. During the first mark-in of the garment, the barcode of the HSL is associated with that definition of the garment and saved in the SPOT system. Any time following the first mark-in, the garment can be scanned to conveniently skip the individual item detailing process.
HSL Location Guide
Standardized tagging locations allow for easily locating garment tracking tags. The standard location has been defined to allow for easy access to the HSL label and to not damage the garment.
Maintaining these standards will allow operators, managers, and inspectors to quickly locate tracking tags.
The secondary tagging locations should be used only when the primary tagging location is not available or if tagging in the primary location could cause damage to the garment.
LEFT and RIGHT in the following diagrams are always determined as if you were wearing the garment.
There is a THIRD OPTION for tagging: a temporary tag. A temporary tag should be used ONLY when damage to a garment is probable or when the HSL cannot be effictively placed outside of wearable sight.
Click here for a print- and edit-able document including the following information.
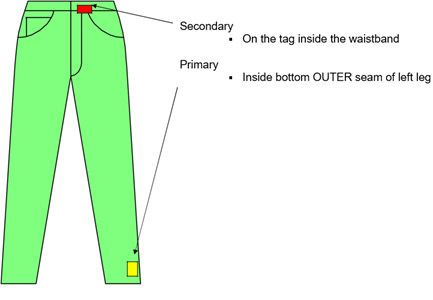
Trousers

Shorts
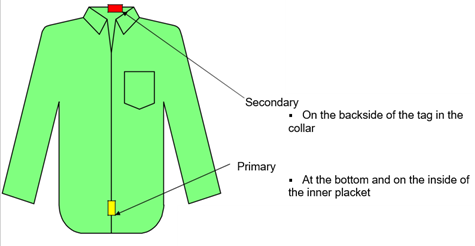
Shirt/Blouse
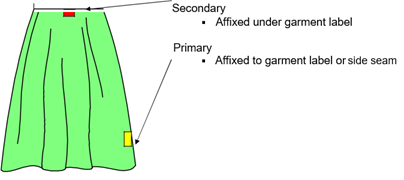
Skirt
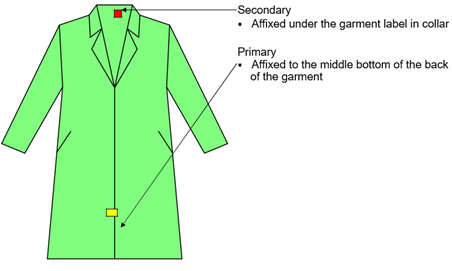
Suit Jacket or Outer Coat
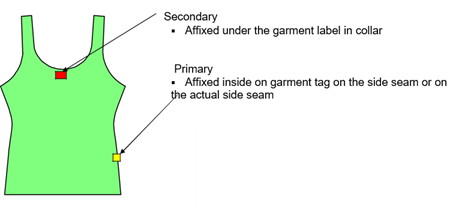
Sleeveless Blouse, Tank Top, or Dress
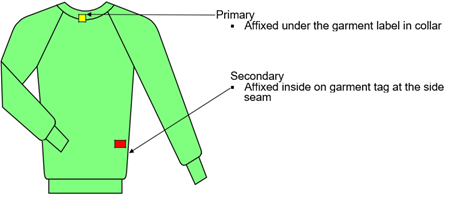
Sweater or Jogging Suit
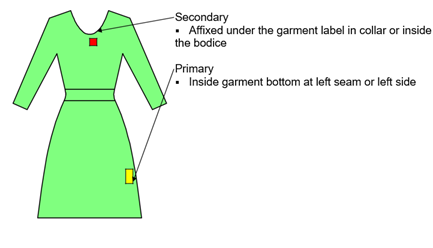
Dress or Gown
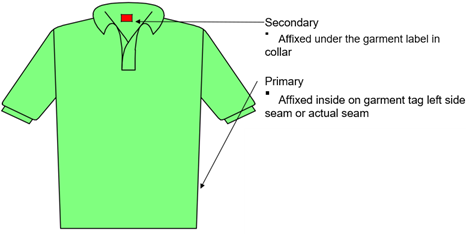
Short Sleeve Shirt
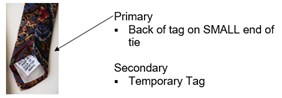
Ties
Create HSL Profile
To start the HSL process you will need to create a HSL profile in SPOT. Navigate to:
Setup > Program Configuration > Company > HSL Settings >HSL Profiles
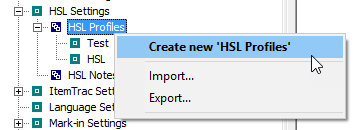
Righ click 'HSL Profiles', then select 'Create new 'HSL Profiles''.

Name: Name the profile something easily identified.
Profile Prefix: Leave this blank.
Congratulations! You now have an HSL profile.
Tip:>Setup > Program Configuration > Company >Mark-in Settings > Price Tables > (Table Name) > expand 'Departments'
Select the departments you will be printing for and make sure that 'Disable ItemTrac' is not checked.
HSL Settings (Store)
Once you have completed the profile creation, it is time to assign it at the store level. Navigate to:
Setup > Program Configuration > Store > HSL Settings > HSL Profile
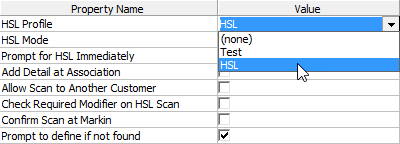
Use the drop down to assign your HSL profile.
Setup > Program Configuration > Store > HSL Settings
The remaining settings are preference based.
Tip: At minimum, it is recommended to make sure 'Prompt to define if not found' is checked.
Congratulations! Your HSL profile is now ready to use.
Item Trac
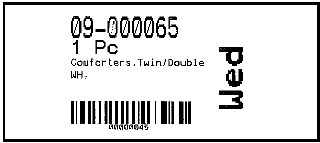
ItemTrac tags function like HSL’s, however the number associated to the garment only last as long as the invoice is in production. Once the invoice has been picked up, the number is recycled and available for use once more. The most common method for using ItemTrac is printing. This happens at the time of detail and is almost exclusively done through Zebra printers. These are then attached to the appropriate garment and will stay with it until the garment is returned to the customer. The tags generally look something like this.
Create ItemTrac Profile
Before you can begin to use ItemTrac you must create a profile if one does not already exist. To begin, navigate to:
Setup > Program Configuration > Company >ItemTrac Settings > ItemTrac Profile
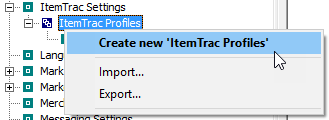
Right click on ItemTrac Profile. Select 'Create new 'Itemtrac Profiles'.
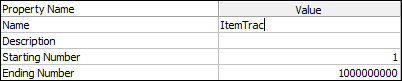
Name: This can be anything.
Starting Number: 1.
Ending Number: 1000000000.
Congratulations! You now have an ItemTrac profile.
ItemTrac Settings (Store)
Once you have created your ItemTrac profile, you will need to assign it at the store level. Navigate to:
Setup > Program Configuration > Store > ItemTrac Settings > ItemTrac Profile
Use the drop down to select your ItemTrac profile.
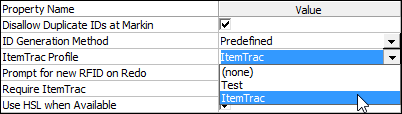
Setup > Program Configuration > Store > ItemTrac Settings
Below are the recommended starting settings. You can configure these based on preference.
Disallow Duplicate IDs at Markin: Checked.
ID Generation Method: ItemTrac Profile. Tip: This is required for ItemTrac printing.
ItemTrac Profile: What you just created under 'Create ItemTrac Profile'.
Require ItemTrac: Checked.
Use HSL when Available: Checked.
Once you have set the store ItemTrac settings, you will need to assign tag profiles to departments.
Setup > Program Configuration > Store > Mark-in Settings > Department Settings > Edit
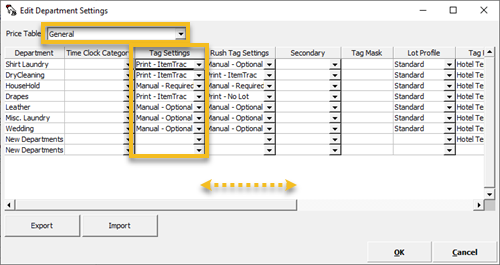
Choose the price table that will be printing the ItemTrac tags.
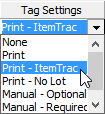
For each department that will be printing the tags set 'Tag Settings' and 'Rush Tag Settings' to 'Print - ItemTrac'.
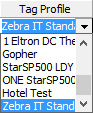
Then set 'Tag Profile' and 'Rush Tag Profile' to the Zebra template you want to use for each department.
Congratulations! You have configured your store settings for ItemTrac tag printing. See about Zebra setup and tag printing setup here.
Once the printer is setup in SPOT, your ItemTrac tags will now print automatically.
ItemTrac Default Printing Profiles
SPOT Support has three default templates that can be imported, listed below.