Connect Mobile is an app used to perform invoice-based operations, which are committed to the Spot database in real time.
Overview
Login
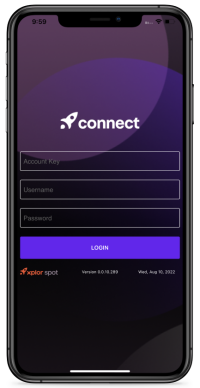
Account Key This is obtained from Spot Support
Username Spot User name (configured in Spot)
Password Spot Password (configured in Spot)
Tip: Once you have successfully used these credentials to log into Connect Mobile, they will be saved to the current device and you will not need to re-enter, unless you select LOGOUT from the About menu.
Depending on the user-credentials used to log-in to Connect Mobile, you may be prompted to purchase a license. Select Purchase a Connect Mobile license and the license fee will be automatically added to your monthly billing statement.
If you already have an active, unused Connect Mobile license, you will see this screen. Select the Existing Connect Mobile License Available button to assign the available license to this device.
To migrate licenses between devices, see the REVOKE LICENSE information below.

Choose a uniqe Device Name.
Click Save. Your device now has an allocated license and unique device name saved to your account. Use these for license management going forward.
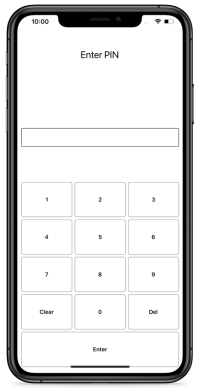
Enter your user PIN.
Tip: If the current device has an active Connect Mobile license, you won't see the above screen. You will only be prompted for your PIN, at this screen.
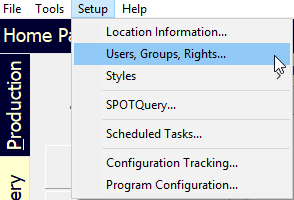
The user's login name, password, and PIN can be found under Setup > User, Groups, Rights…

The user's login, password, and PIN must be set under the Users tab.
Store Select
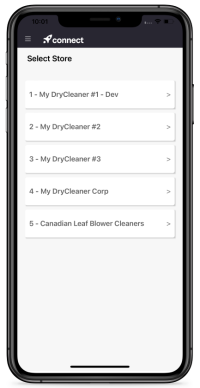
Choose the store that you want to use. For most users, the only option will be the user's designated Principal Store, as set at Setup > Users, Groups, Rights > Users > Select User > Principal Store.
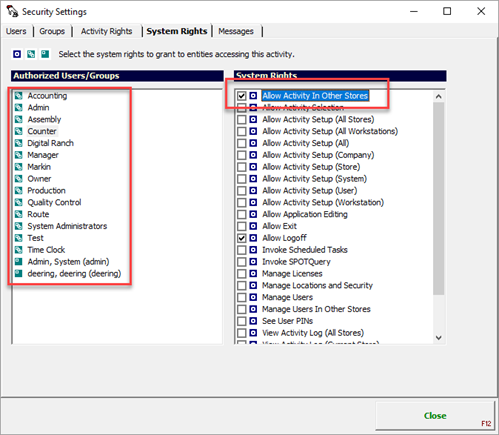
If a User needs access to other locations, enable Allow Activity In Other Stores for the User's Group, located at Setup > Users, Groups, Rights > System Rights > Select a Group > Allow Activity In Other Stores.
Rack Orders

Use this screen to assign orders to specific racking locations. The racking operations are committed to the Spot database in real time.
The Rack Orders function can be run in three different modes (described below). The current mode shows in the area just above the scanner window - simply tap on it to change the mode.
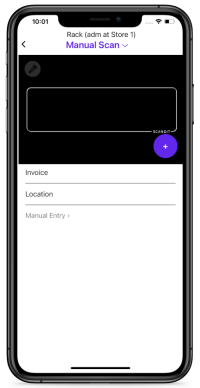
Manual Scan / Other Location
Use this mode when you want to assign a different location for each order scanned.
Scan window: Use the Scanning button to activate the scan window.
Tip: Use the flashlight symbol to activate the device's flashlight when needed.
Once the order and the location have been scanned, Spot will be updated.
Below the Location and Invoice fields you will be able to see the last order scanned.
Select the 'Last Scanned Invoices' and 'See All' buttons to view a list of orders scanned since you logged in.
Once you have selected Manual Entry, you can enter your invoice number and select Other Locations to view orders already racked for that customer.
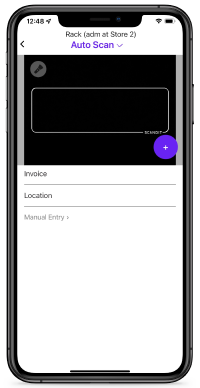
Auto Scan
Use this mode if you want to assign multiple orders to a single location.
Scan window: Use the Scanning button to activate the scan window.
Tip: Use the flashlight symbol to activate the device's flashlight when needed.
Scan the location first, then scan all orders you want assigned to that location. Once you have finished with a location, you can simply scan another location and continue.
Below the Location and Invoice fields you will be able to see the last order scanned.
Select the 'Last Scanned Invoices' button to view a list of orders scanned since you logged in.
Auto Preset
Use this mode if you want to rack orders to a preset location.
When this mode is selected, you will be prompted to choose a preset location.
Preset locations can be configured in Spot Setup > Program Configuration > Store > Rack Locations.
Tip: Only "Auto"-type locations will show in Connect Mobile.
In the Rack Orders screen, once you have selected the Auto Preset mode and chosen a preset location you can begin scanning orders.
Scan window: Use the Scanning button to activate the scan window.
Tip: Use the flashlight symbol to activate the device's flashlight when needed.
Your location should be filled in, simply begin scanning orders.
Below the Location and Invoice fields you will be able to see the last order scanned.
Select the 'ORDERS SCANNED THIS SESSION - X' button to view a list of orders scanned since you logged in.

Incorrect Scans
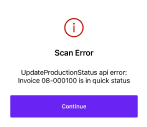
Quick
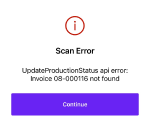
Not Found
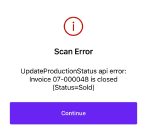
Closed
Processing Steps
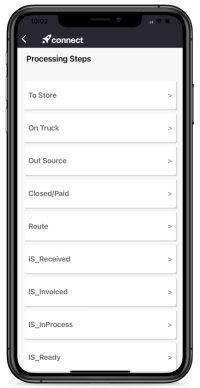
You can use Connect Mobile to move invoices to each of your custom workflow steps using the Processing Steps function.
Once you have selected your step, you can begin scanning invoices to it.
Scan window: Use the Scanning button to activate the scan window. Tip: Use the flashlight symbol to activate the device's flashlight when needed.
Your location should be filled in – simply begin scanning orders.
Below the Location and Invoice fields you will be able to see the last order scanned.
Select the 'Last Scanned Invoices' to view a list of scanned orders since you logged in.
Each step that appears here can be found under:
Setup > Program Configuration > Company Settings > Workflow Settings > Processing Steps > Any steps with “Scan” as the handler

For wholesalers the location type will need to be set to 'Wholesaler'.
The list of wholesalers can be found under:
Setup > Program Configuration > Company Settings > Operations Settings > Wholesalers
Lookup HSL / Temp ID
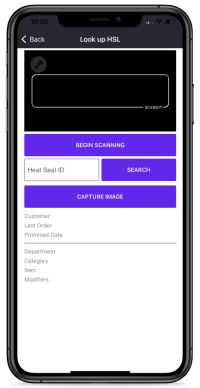
If you want information about a heat seal label while not at a Spot station, use the 'Lookup HSL' function.
Scan window: Use the Begin Scanning to activate the scan window. Tip: Use the flashlight symbol to activate the device's flashlight when needed.
Scan the HSL.
Below you will get the relevant information for the HSL.
Tip: Company Settings > ItemTrac Settings > ItemTrac Barcode Type. If the value = “Force Numeric†then the HSL Lookup keyboard will be numeric instead of alphanumeric.
When a temporary ID is scanned you will be presented with 'Temp Item ID found' in addition to the information for the last order it was on.
HSL Image Capture and Review
Connect Mobile is capable of capturing and saving to the Spot database images of HSL-tagged garments
Select the Look up HSL action, scan the HSL tag of a garment with damage, stain, etc. and select CAPTURE IMAGE.
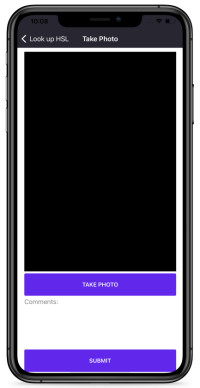
Once you have arranged the garment appropriately, select TAKE PHOTO. Take a photo of the garment and select OK.
Enter any relevant comments, i.e. "Minor damage on left sleeve." Select SUBMIT.
Repeat as necessary. You can capture and save as many images as is necessary to document the damage, stain, etc.
The captured image(s) and descriptions are now saved and reviewable in Spot. These images can also be emailed to customers or exported from Spot.
Scan Inventory
Connect Mobile now allows you to use multiple devices to complete inventory scanning at the same time!
To begin, you will need to open the Scan Inventory screen on a Spot station
Spot > System > Inventory > Scan Inventory
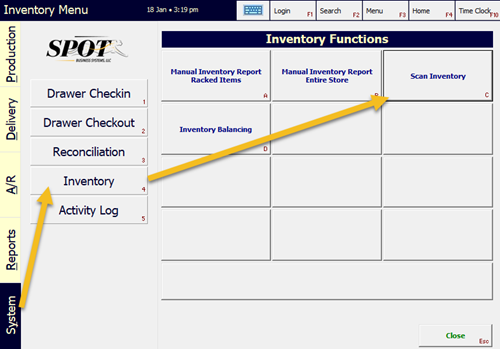
Choose your cutoff date.
Tip: It is highly recommended to scan inventory AFTER production times to avoid invoices changing status during the inventory session.
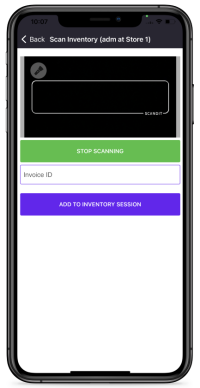
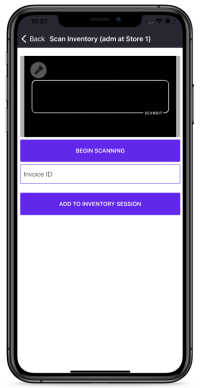
In Connect Mobile, start scanning invoices.
Scan window: Use the Begin Scanning button to activate the scan window
. Tip: Use the flashlight symbol to activate the device's flashlight when needed.
Spot will update with each scan.
Select ADD TO INVENTORY SESSION.
Assign Bags

Connect Mobile allows you to assign and reassign bags to customers. The workflow of this process is:
Step 1: Scan an invoice, bag tag, or other barcode already associated with the customer
Step 2: Scan a Bag ID HSL to temporarily associate that bag with the selected customer.
When this order is eventually racked, the Bag ID will become unassigned, ready to be assigned to a new invoice or customer.
Menu

Select the menu button at the top left.

Select Action - Return to action selection window.
Change Store - Return to store selection window.
Settings - View and modify Connect Mobile settings.
About - Get Spot and Connect Mobile information, including diagnostics, database management, and licensing.
Change User - Log out of the current session and return to the PIN screen, so a different user can log in.
Settings
Scan Settings
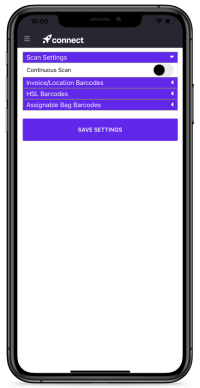
Continuous Scan - When activated, after pressing BEGIN SCANNING , items will be scanned and logged until STOP SCANNING is pressed.
Invoice/Location Barcodes
The default barcode symbologies are Code 128, Code 39, Code 93, and i2of5. These are all that are needed, but you can fine-tune the settings and turn on other barcode types. However, turning on unused barcode types can have negative consequences because the reader is very sensitive and might pick up unintended scans.
Symbology - The values in this column represent all barcode symbologies supported by Connect Mobile. These settings refer only to barcodes used to identify Invoices and Locations.
Min/Max - The values in this column can be modified to set the allowed minimum and maximum number of digits in the individual barcodes for each supported symbology.
Enabled? - Values in this column can be set to either True or False to enable or disable support for individual barcode symbologies.
Symbology - The values in this column represent all barcode symbologies supported by Connect Mobile. These settings refer only to barcodes used to identify individual garments.
Min/Max - The values in this column can be modified to set the allowed minimum and maximum number of digits in the individual barcodes for each supported symbology.
Enabled? - Values in this column can be set to either True or False to enable or disable support for individual barcode symbologies.
HSL Barcodes
Symbology - The values in this column represent all barcode symbologies supported by Connect Mobile. These settings refer only to barcodes used to identify assignable garment bags.
Min/Max - The values in this column can be modified to set the allowed minimum and maximum number of digits in the individual barcodes for each supported symbology.
Enabled? - Values in this column can be set to either True or False to enable or disable support for individual barcode symbologies.
Assignable Bag Barcodes
Symbology - The values in this column represent all barcode symbologies supported by Connect Mobile. These settings refer only to barcodes used to identify assignable garment bags.
Min/Max - The values in this column can be modified to set the allowed minimum and maximum number of digits in the individual barcodes for each supported symbology.
Enabled? - Values in this column can be set to either True or False to enable or disable support for individual barcode symbologies.
About
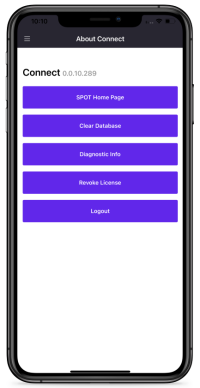
Spot HOME PAGE - This will open the Spot web page.
CLEAR DATABASE - This will remove all scan data for the current login session. It will then log you out.
DIAGNOSTIC INFO - Here you can find information for your device and Connect Mobile.
REVOKE LICENSE - Immediately revokes the Connect Mobile license for the current device. Use this functionality to migrate licenses between devices. Revoking a device's license will allow another device (using the same Account Key) to use that license. See the Licensing section above for more information.
LOGOUT - Clears the credentials associated with the device and license. Will return the user to the Account Key, Username, and Password screen.
Symbologies
If you do not find your symbology below, please contact Spot Suppport.
Ean13
Ean8
Upca
Upce
Datamatrx
QR
Code 39
Code 93
Code 128
Pdf417
Interleaved2Or5
MicroPdf417